How to Build Strength with Limited Equipment
Yes, you can build meaningful strength with limited or no equipment. The key is understanding that your body responds to mechanical tension and progressive challenge, not to the weight on a barbell. Pick three compound movements, choose one way to make them harder each week, and train three times a week. That’s the whole framework.
Your 3-step starter plan:
- Pick 3 compound movements. One push (push-up), one pull (row or pull-up), one leg (squat or lunge). These hit every major muscle group.
- Choose one overload method. Slow the tempo, shift to a harder leverage position, or add reps. More on this below.
- Schedule 3 sessions per week. Mayo Clinic recommends training all major muscle groups at least twice weekly, and starting with a resistance that tires muscles after about a dozen repetitions.
A basic session takes 20–30 minutes: 5-minute warm-up, then 2 push exercises, 2 pull exercises, 2 leg exercises. Two sets each, rest 60–90 seconds between sets. Done.
Level Up Gym coaches use this exact framework with clients who train at home or with minimal gear. The structure is what produces results, not the equipment list.
Key Takeaways
Building strength with limited equipment works because mechanical tension, progressive overload, and neural adaptation respond to leverage, tempo, and volume, not just external weight.
PointDetails
Train 3 times per week
Full-body sessions with at least one rest day between them produce consistent strength gains.
Use leverage and tempo to overload
Shift to harder positions, slow your eccentrics to 3–5 seconds, and add unilateral work before buying more gear.
Track every session
Log reps, sets, tempo, and range of motion so you know exactly when to advance to the next progression.
Prioritize form and recovery
Mayo Clinic guidance: reduce reps or variation difficulty if form breaks; sleep 7–9 hours and allow 48 hours between sessions targeting the same muscles.
Level Up Gym hybrid programs
Coached hybrid and online training in Stratford and Bridgeport, CT, with a 6-week beginner onramp and no long-term contract.
Table of Contents
- Why building strength with limited equipment actually works
- Core exercises and how to progress them
- How to make exercises harder without adding weight
- Three ready-to-use workouts: beginner, intermediate, advanced
- How to program frequency, volume, and realistic timelines
- What gear gives you the biggest return
- Warm-up, injury prevention, and when to get help
- How Level Up Gym coaches structure limited-equipment strength gains
- What actually works, and what to expect
- Level Up Gym can accelerate your progress
- Sources
- FAQ
Why building strength with limited equipment actually works
The short answer: your muscles don’t know what’s making them work hard. They respond to tension, fatigue, and challenge. Human Kinetics explains that early strength gains are largely neural, and that manipulating leverage and time under tension lets you replicate mechanical load without external plates.
Here’s what that means practically. In your first 2–4 weeks of training, most of your strength increase comes from your nervous system getting better at recruiting muscle fibers, not from your muscles growing. Your brain learns to fire more motor units at once, coordinate muscle groups more efficiently, and reduce inhibitory signals that hold you back. That’s why beginners get noticeably stronger fast, even without adding weight.
After those first weeks, continued progress depends on hypertrophy, which takes months of consistent overload. This is where the right tactics matter.
The practical levers you control without a weight rack:
- Leverage. Move your body position to increase the load on the working muscles. A push-up with feet elevated shifts more weight to your chest and shoulders. An archer push-up loads one arm at a time.
- Tempo and time under tension. A 3–5 second eccentric (lowering) phase increases mechanical stress and builds tendon resilience. Slow eccentrics are a validated overload tool, not just a beginner trick.
- Unilateral work. Single-leg squats and single-arm rows roughly double the load on each limb compared to bilateral versions.
- Density and volume. More total reps or sets in the same time window is a form of overload. So is shortening rest periods.
Trainmate references meta-analytic evidence that lighter loads taken near failure can produce similar hypertrophy to heavy lifting. The load doesn’t have to be heavy. It has to be challenging.
Pro Tip: Try “velocity intent” on your concentric reps: even when the movement is slow, mentally try to push or pull as fast as possible. This recruits more motor units and shifts the session from conditioning toward strength.
Core exercises and how to progress them
Master a small set of movement families and you have everything you need. Push, pull, hinge, squat, lunge, and core. Six categories. That’s the whole map.
The goal isn’t to collect exercises. It’s to get very good at a few, then advance to harder versions when you’re ready. The rule is simple: when you can hit your target sets and reps with clean form and 2–3 reps still in the tank, move to the next variation.
Movement progressions:
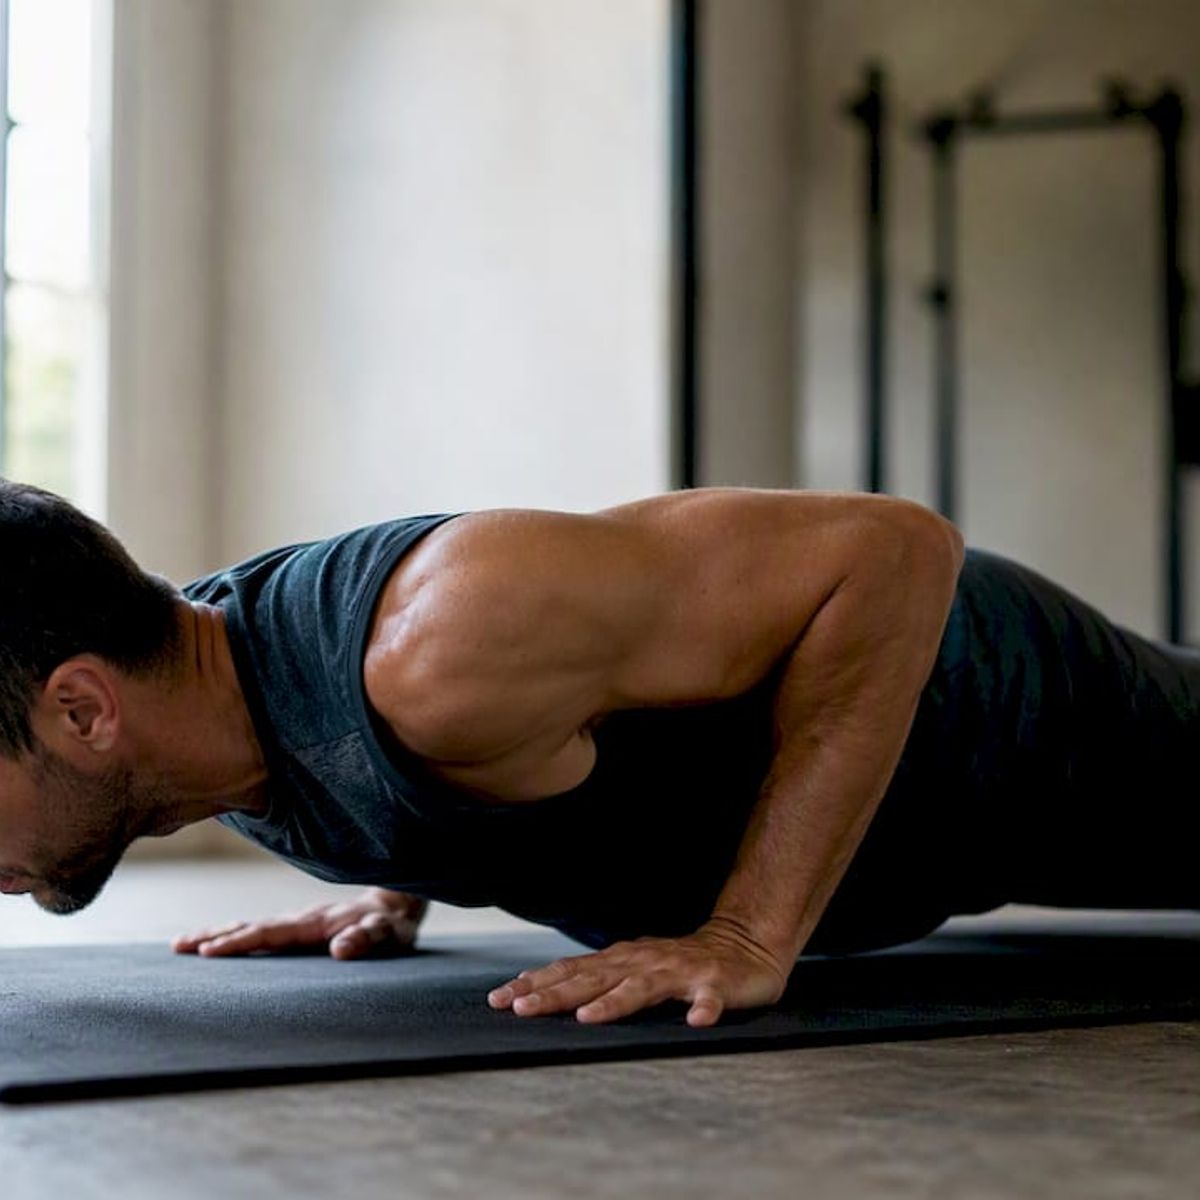
- Push. Incline push-up → standard push-up → close-grip push-up → archer push-up → single-arm push-up negatives. Common mistake: letting hips sag or flaring elbows past 45 degrees.
- Pull. Dead hang → band-assisted pull-up → jumping pull-up with slow lower → full pull-up → weighted pull-up (backpack). If you can’t do a pull-up yet, calisthenics programming typically prescribes 4–6 weeks of band-assisted work with dead-hang grip conditioning to build capacity for unassisted reps.
- Hinge. Hip hinge bodyweight → single-leg Romanian deadlift → Nordic hamstring curl (feet anchored under couch). Common mistake: rounding the lower back at the bottom.
- Squat. Bodyweight squat → Bulgarian split squat → pistol squat negatives → full pistol squat. Common mistake: knees caving inward on the descent.
- Lunge. Reverse lunge → walking lunge → lateral lunge → deficit reverse lunge (front foot elevated).
- Core. Plank → plank with shoulder taps → hollow body hold → hollow body rock → L-sit. Core stability multiplies strength across every other movement, so don’t treat it as an afterthought.
Harvard Health notes that explosive bodyweight moves like jump squats and clap push-ups are safe for beginners when scaled, and they help recruit fast-twitch muscle fibers that pure slow-rep work misses. Add one explosive variation per session once you’ve built a base.
Pro Tip: Film yourself from the side once a week. You’ll catch form breakdowns you can’t feel in the moment, especially elbow flare on push-ups and knee cave on squats.
How to make exercises harder without adding weight
The most common mistake in home training is doing the same workout for months and calling it a plateau. It’s not a plateau. It’s a lack of overload.
Trainmate.ai’s overload guide lays out the clearest framework: tempo, leverage, range of motion, volume, and unilateral complexity. Here’s how each one works in practice.
Leverage is the fastest way to increase difficulty without any equipment. Moving your feet higher on a push-up, or shifting your weight further over one arm in an archer row, changes the effective load on the working muscles immediately.
Tempo is underused. A 4-second lowering phase on a squat or push-up creates more time under tension, more muscle damage, and more hypertrophic stimulus than a fast rep at the same bodyweight. Eccentric-focused sets also build tendon resilience, which matters more for long-term training than most people realize.
Range of motion is free overload. A push-up with hands on books goes deeper than a floor push-up. A deficit reverse lunge (front foot on a step) adds hip flexor stretch and glute loading that the flat version skips.
Unilateral complexity is the most powerful lever of all. A single-leg squat is not twice as hard as a two-leg squat. It’s several times harder, and it exposes side-to-side imbalances that bilateral work hides.
Illustrated push-up progression with measurable checkpoints:
- Incline push-up (hands on a counter or bench). Target: 3 sets of 15 with 2 reps in reserve. When you hit this, move on.
- Standard push-up. Target: 3 sets of 12 with controlled 2-second lowering. When you hit this, move on.
- Archer push-up (one arm extended to the side, most weight on the other). Target: 3 sets of 8 per side. When you hit this, move on.
- Single-arm push-up negative (lower on one arm, push up on two). Target: 3 sets of 5 per side with a 4-second descent.
The key insight on failure vs. near-failure: Training to absolute failure every set increases injury risk and slows recovery without meaningfully improving results. Stopping 1–2 reps short of failure (RIR 1–2) on most sets, with one true near-failure set per exercise per week, gives you the stimulus without the breakdown. Monitor your RIR honestly — if you think you have 3 reps left and you’re actually done, you’re undertraining.
Pro Tip: Add a slow-eccentric set as your last set of each exercise, 4–5 seconds on the way down. This one change can restart progress when reps and leverage feel stalled.
Three ready-to-use workouts: beginner, intermediate, advanced
Each template below is a full-body session. Run it 3 times per week with at least one rest day between sessions. All three use minimal gear, and each includes a bodyweight-only substitution for days when you have nothing at all.
Warm-up (5 minutes, before every session):
- 30 seconds arm circles, forward and back
- 30 seconds leg swings, each leg
- 10 bodyweight squats, slow and controlled
- 10 hip hinges (touch toes or shins)
- 10 scapular push-ups (lying face down, squeeze shoulder blades)
Cooldown (3 minutes): Child’s pose (30 sec), pigeon stretch each side (30 sec), doorway chest stretch (30 sec), hamstring stretch lying down (30 sec).
1. Beginner (bodyweight only)
No-equipment substitution: replace rows with prone Y-T-W raises (lying face down, lift arms into Y, T, and W shapes).
2. Intermediate (resistance bands + pull-up bar)
No-equipment substitution: replace band pull-apart with prone Y-T-W raises; replace band-assisted pull-up with table row.
3. Advanced (pull-up bar + optional kettlebell)
ExerciseSetsRepsRest
Archer push-up
4
6–8 each side
90 sec
Pull-up (full or weighted with backpack)
4
5–6
90 sec
Pistol squat negative
3
5 each leg
90 sec
Single-arm row (kettlebell or band)
3
8 each arm
75 sec
Nordic hamstring curl
3
5–6
90 sec
L-sit or tuck L-sit
3
10–15 sec
60 sec
No-equipment substitution: replace kettlebell row with archer row; replace Nordic curl with single-leg hip hinge.
The PoinT GO calisthenics program guide structures these phases as foundation, intensification, and peak blocks, with explicit rep and rest prescriptions at each stage. The beginner template above maps to the foundation phase; the advanced template sits in the intensification range.
For readers who want to build a fully customized routine from scratch, the HTK Training beginner guide walks through exercise selection and progression decisions step by step.
How to program frequency, volume, and realistic timelines
Train full-body 3 times per week with at least one rest day between sessions. This is the most evidence-supported frequency for beginners and intermediate trainees, and it’s what a 3×/week program structure consistently produces in terms of muscle retention and strength gains.
Programming guidelines:
- Strength focus (1–5 reps): Heavy relative effort, long rest (2–3 minutes). Use your hardest progressions.
- Hypertrophy focus (6–15 reps): Moderate effort, rest 60–90 seconds. This is where most limited-equipment training lives.
- Endurance focus (15+ reps): Shorter rest, higher density. Useful for conditioning but limited for pure strength.
- Volume per session: 2–4 sets per exercise, 4–6 exercises total. More than this in a home session usually means you’re not working hard enough per set.
- Recovery: 48 hours between sessions targeting the same muscle groups. Sleep 7–9 hours. Protein intake matters: aim for 0.7–1 gram per pound of bodyweight.
For context on how strength and endurance training differ in rep ranges and adaptation timelines, that distinction shapes how you choose your weekly rep targets.
Realistic timeline:
PhaseTimelineWhat to expectKey signal
Neural adaptation
Weeks 1–4
Strength up, size roughly the same
Reps increase quickly
Early hypertrophy
Weeks 5–12
Visible muscle development begins
Progressions feel harder
Consolidation
Months 3–6
Steady strength and size gains
Need harder variations
Advanced
6+ months
Slower gains, need periodization
Stalls require program redesign
What to track (no scale required):
- Reps and sets per exercise, logged every session
- Tempo used (e.g., “3-second eccentric”)
- Range of motion notes (e.g., “full depth squat” vs. “half depth”)
- Time under tension for key sets
- Rate of perceived exertion or reps in reserve
A structured workout program produces better results than random effort because it creates measurable checkpoints. When you can see that your push-up reps went from 8 to 15 over six weeks, you know the program is working and you know when to advance.
What gear gives you the biggest return
A few inexpensive items unlock major progress. You don’t need all of them at once, and you don’t need any of them to start.
Ranked by bang-for-buck:
- Resistance bands ($15–30 for a set). The single most versatile purchase. Use them to assist pull-ups, add resistance to squats and rows, do face pulls and pull-aparts for shoulder health, and create tension in exercises that have none at the bottom of the range. Get a set of loop bands in multiple resistances; avoid tube bands with handles for strength work, as they’re less stable under load.
- Doorway pull-up bar ($25–40). Unlocks the entire pull movement family without a gym. Look for a bar that fits your doorframe without screws; test the weight limit before loading. Dead hangs, pull-ups, chin-ups, and hanging knee raises all become available immediately.
- Suspension straps or gymnastic rings ($30–60). Rows, push-ups, and dips become adjustable in difficulty by changing the angle of your body. Rings add instability that recruits stabilizer muscles that fixed bars don’t touch.
- One adjustable dumbbell or kettlebell ($50–120). A single 35-pound kettlebell covers swings, goblet squats, single-arm rows, and presses. An adjustable dumbbell covers more rep ranges. Buy one before buying two.
- Yoga mat ($20–30). Floor work, stretching, and core exercises are all more comfortable and safer on a mat. Not exciting, but you’ll use it every session.
Buying advice: Start with bands and a pull-up bar. Together they cost under $70 and expand your exercise library by dozens of movements. Buy the kettlebell or dumbbell only when you’ve stalled on leverage and tempo progressions and need external load to keep advancing.
When to delay purchasing: If you can’t yet do 3 sets of 10 clean push-ups and 5 pull-ups, you don’t need more equipment. You need more practice with what you have.
Warm-up, injury prevention, and when to get help
Always warm up. Always respect pain signals. These two rules prevent most training injuries.
5-minute warm-up checklist:
- 60 seconds of light movement (jumping jacks, marching in place, or a brisk walk)
- 10 hip circles each direction
- 10 thoracic rotations (seated or standing, hands behind head)
- 10 shoulder rolls forward and back
- 10 slow bodyweight squats with a 2-second pause at the bottom
- 10 scapular retractions (squeeze shoulder blades together and hold 2 seconds)
Mayo Clinic emphasizes that proper form, full range of motion, and controlled tempo are the central safety and effectiveness rules. If your form breaks down, reduce reps or move to an easier variation. Don’t push through with bad mechanics.
Common form fixes:
- Shoulder pain during push-ups: Widen your hand position slightly and keep elbows at 45 degrees from your torso, not flared to 90.
- Lower back pain during hinges: Brace your core before you move, and keep a neutral spine throughout. If pain persists, stop the exercise.
- Knee pain during squats: Check that your knees track over your second toe. Reduce depth until you can maintain alignment.
Red flags that mean stop and see a professional:
- Sharp or shooting pain during a movement (not muscle burn)
- Joint swelling after a session
- Pain that persists more than 48 hours after training
- Any numbness or tingling in limbs
A physical therapist or sports medicine physician is the right call for any of these. Don’t try to train through structural pain.
Pro Tip: Add 2 minutes of shoulder and hip mobility work at the end of every session, not just the beginning. End-of-session mobility, when muscles are warm, produces faster range-of-motion gains than pre-workout stretching alone.
How Level Up Gym coaches structure limited-equipment strength gains
What separates a coached program from a self-directed one isn’t the exercises. It’s the structure, the accountability, and the micro-progressions that keep you moving forward when you’d otherwise stall or guess.
At Level Up Gym, coaches build limited-equipment programs around a weekly microcycle that balances skill practice, strength work, and recovery. Here’s how Coach Malcolm structures a typical week for a client training at home with bands and a pull-up bar:
Coach Malcolm’s 1-week microcycle:
- Day 1 (Strength focus): Push and pull at high effort. Archer push-ups, pull-ups, Bulgarian split squats. 4 sets each, RIR 1–2. Full rest between sets.
- Day 2 (Rest or active recovery): 20-minute walk, hip and shoulder mobility work.
- Day 3 (Skill + volume): Hollow body progressions, handstand wall holds (skill practice at low intensity), then higher-rep push and leg work. 3 sets of 12–15.
- Day 4 (Rest).
- Day 5 (Full-body strength): Unilateral focus. Single-leg squats, single-arm rows, Nordic curl negatives. 3–4 sets, RIR 1–2.
- Day 6 (Conditioning): Band circuit or short AMRAP (as many rounds as possible) for 15–20 minutes. Keeps work capacity up without adding strength fatigue.
- Day 7 (Rest).
The rationale: skill practice runs at low intensity so it doesn’t compete with strength recovery. Strength days are separated by at least 48 hours. Volume accumulates across the week without any single session being so long it becomes unsustainable.
The coaching difference: A coach doesn’t just give you exercises. They watch your RIR estimates, catch when you’re sandbagging or overreaching, and adjust the program before a plateau becomes a problem. Most people who stall at home are either not progressing the difficulty fast enough or progressing it too fast and accumulating fatigue they don’t recognize.
When coaching speeds results most:
- When you’ve been doing the same routine for 6+ weeks without measurable progress
- When you’re unsure whether your form is limiting your gains or protecting you from injury
- When you want a program built around your specific schedule, equipment, and goals
For readers building from scratch, the HTK Training routine-building guide is a practical starting point for customizing templates to your own situation.
What actually works, and what to expect
The clients who make the fastest progress with limited equipment share one habit: they track every session. Not obsessively, just a note in their phone. Exercise, sets, reps, how hard it felt. That’s it.
The most common beginner mistake isn’t poor form or wrong exercises. It’s training without a progression plan. People do 3 sets of 10 push-ups for eight weeks and wonder why nothing changed. The body adapts fast. If you’re not making the stimulus harder, you’re maintaining, not building.
What you should realistically expect: noticeable strength gains in the first 4 weeks, visible muscle changes starting around weeks 8–12 with consistent effort and adequate protein. Progress slows after that, but it doesn’t stop. It just requires more deliberate overload choices.
Start the 3-step plan from the opening of this guide today. Pick your three movements, choose your first overload method, and schedule your first three sessions this week.
Level Up Gym can accelerate your progress
Doing this on your own works. Doing it with a coach works faster.
Level Up Gym’s hybrid training programs are built for exactly this situation: people who want structured, coach-led strength development without being locked into a traditional gym model. Sessions run in-person at Stratford and Bridgeport, CT, and online coaching is available for clients who train at home. You get a real program, real feedback on your form, and a coach who adjusts your progressions before you plateau.
The 6-week beginner onramp is designed for people starting from scratch or returning after time off. Small-group personal training keeps the cost lower than private sessions while giving you the accountability and coaching attention that self-directed training can’t replicate. No long-term contract required.
Book a session or explore the programs at Levelupgym.
Sources
The sources below were used throughout this guide and are worth bookmarking for deeper reading.
- The science of getting stronger without weights – Human Kinetics
- Strength training: Get stronger, leaner, healthier — Mayo Clinic
- Plyometrics: three explosive exercises even beginners can try — Harvard Health
- Trainmate
- Bodyweight Calisthenics Strength Program Guide | PoinT GO Research
This article is general information, not a substitute for advice from a qualified doctor. Consult a qualified healthcare professional about your own circumstances before acting on anything here.
FAQ
Can you build muscle with limited equipment?
Yes. Research supports that lighter loads taken near failure can produce similar hypertrophy to heavy lifting. The key is applying progressive overload through leverage, tempo, and volume rather than adding external weight.
How do you build strength with no equipment at all?
Use bodyweight progressions: push-ups, pull-ups (using a table edge or low bar), squats, lunges, hinges, and core holds. Progress by changing leverage (harder positions), slowing the eccentric phase, or moving to unilateral variations.
What is the 3-3-3 rule in gym training?
The 3-3-3 rule isn’t a single standardized framework, but a common interpretation in strength training refers to training 3 days per week, performing 3 sets per exercise, and targeting 3 compound movement patterns per session. This aligns with Mayo Clinic’s recommendation to train all major muscle groups at least twice weekly.
Is it possible to build muscle with limited weights?
Yes. A single kettlebell or dumbbell combined with bodyweight progressions covers every major movement pattern. The limiting factor is not the weight available but whether you’re applying consistent, progressive overload each week.
How long before you see results from limited-equipment training?
Neural strength gains typically appear within weeks 1–4. Visible muscle development usually begins around weeks 8–12 with consistent training, adequate protein, and progressive overload applied each session.
Recommended
- Strength Train Three Days Weekly: Build Muscle That Lasts — Level Up Gym | Level Up Gym
- Types of Strength Training Programs: Pick the Right One Fast — Level Up Gym | Level Up Gym
- Functional Weight Lifting for Everyday Strength — Level Up Gym | Level Up Gym
- Strength vs Endurance Training: Key Differences Explained — Level Up Gym | Level Up Gym