Front Squat vs Back Squat: Choose Your Lift for the Next 2 Weeks
Both front and back squats build real lower-body strength, but the bar position changes everything downstream. Front squats favor an upright torso, a more quad-forward demand, and lower compressive forces on the spine, while back squats let you load heavier and lean more on the posterior chain. Choose front squats for quad-focused work, rehab, or when you want to protect your lower back; choose back squats when maximal load and hip-hamstring-glute development are the priority.
TL;DR:
- Research found greater spinal compression and knee extensor moments in back squats, but similar muscle recruitment and no consistent quad advantage when loads were matched.
- Strength work uses 3 to 6 reps near 80% of your one repetition maximum; hypertrophy favors 8 to 12 reps with lighter loads.
- Front squats require wrist, upper back, and ankle mobility; straps or crossed arms can help, while back squats need safety pins or a spotter.
- Choose back squats for powerlifting totals; favor front squats for lower back sensitivity or upright sports, and rotate both when recovery allows.
Level Up Gym
Build Stronger, Smarter Squats
Level Up Gym offers hybrid training and boxing in Stratford and Bridgeport, with coaching for adults at every experience level.
Table of Contents
- 1. What muscles and mechanics each squat emphasizes
- 2. How to set up and perform a front squat
- 3. How to set up and perform a back squat
- 4. Loading, relative 1RM expectations, and fatigue effects
- 5. Mobility, equipment needs, and safety
- 6. How to choose which squat to focus on
- 7. Level Up Gym coaching notes and sample progressions
- 8. A coach’s take on choosing your squat
- How Level Up Gym helps you learn and progress both squats
- FAQ
- Sources
- Authoritative studies and guidelines cited
1. What muscles and mechanics each squat emphasizes
Bar placement moves your center of mass. A front squat sits the load over your mid-foot and shoulders, which forces a more vertical trunk to keep the bar balanced. A back squat sits the load behind your shoulders, which naturally tips your torso forward and shifts more of the work onto your hips and hamstrings.
A biomechanical comparison of back and front squats in healthy trained lifters found that back squats produce significantly higher compressive forces and knee extensor moments than front squats, while both exercises deliver similar overall muscle recruitment. That is the key nuance: the two lifts are not training different muscles so much as loading the same muscles through different joint angles and forces.
Electromyography research backs up part of this picture. Some studies on hamstring activation differences between the two lifts show greater semitendinosus (hamstring) activity during the back squat, while quadriceps differences between squats are inconsistent from study to study. Separate EMG research in the NSCA Journal found no clear quad advantage for either squat when loads were matched, suggesting the muscles respond more to total load and depth than to bar position alone.
Fatigue tells its own story. The same hamstring and ground reaction force research found that back squats can show larger drops in force output after a fatiguing set than front squats. If you are planning several heavy sets in a session, that fatigue curve matters for how you sequence your work and how many reps you can expect to hold with good form late in a workout.
2. How to set up and perform a front squat
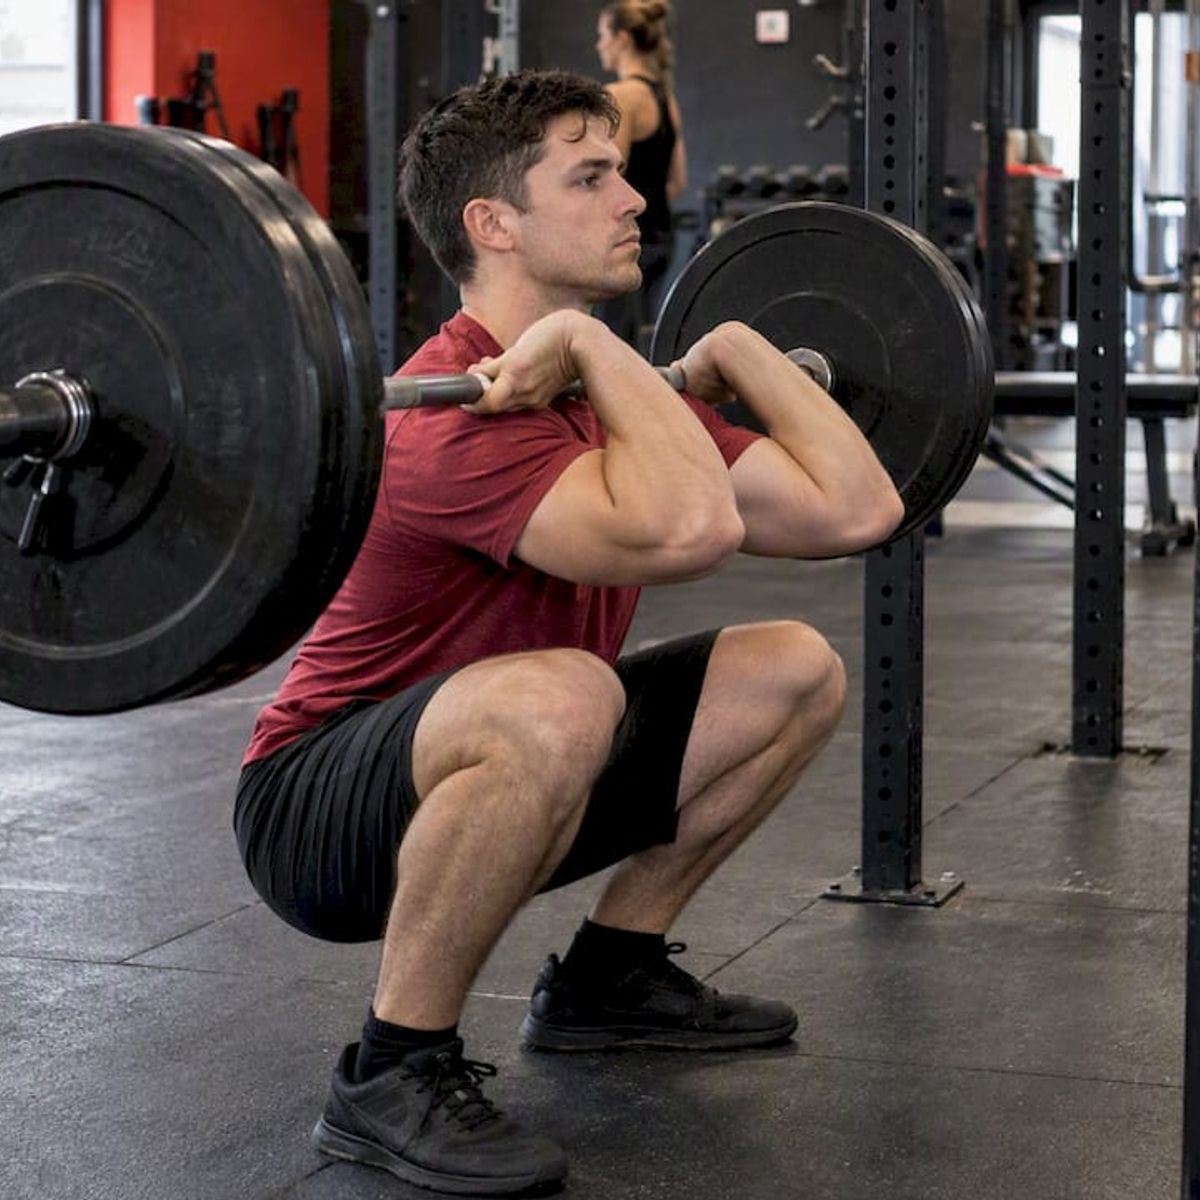
The front squat rewards a tight setup more than almost any other barbell lift. Get the rack position wrong and the rest of the rep falls apart before you even break your knees.
- Choose your grip: clean grip (fingertips under the bar) for mobile wrists, crossed-arm grip for limited wrist extension, or lifting straps looped over the bar for lifters who need more front-rack support.
- Set your feet shoulder-width with toes angled out slightly, then keep your knees tracking over your toes as you descend.
- Drop straight down while keeping your elbows high and your chest tall, aiming for thighs at or below parallel.
- Brace your core and take a breath into your belly before each rep, using your elbows as the main lever that keeps the bar from rolling forward.
- Drive up through your mid-foot, keeping your torso vertical the entire way instead of leaning forward to stand up.
If the front rack feels unstable, regress to a goblet squat or a Zercher squat to build the same upright pattern without the wrist demand. A box front squat, where you briefly touch a box at depth, is a useful tool for lifters who need a consistent depth cue.
Pro Tip: If your elbows drop during the descent, the bar will roll off your shoulders. Cue “elbows up” on every rep until it becomes automatic.
3. How to set up and perform a back squat
Back squat setup splits into two camps: high-bar and low-bar. High-bar rests the bar on your traps, which keeps your torso more upright and shifts slightly more work to your quads. Low-bar sits the bar across your rear deltoids, which lets you lean forward more and recruit more hip and hamstring drive, typically allowing heavier loads.
- Rack the bar at the height that matches your chosen style: higher on the traps for high-bar, lower across the rear delts for low-bar.
- Set your stance slightly wider than shoulder width, with toes angled out enough to let your hips sink between your legs.
- Descend to at least parallel, letting your hips travel back more in a low-bar squat and staying more vertical in a high-bar squat.
- Brace hard before you unrack the bar and keep that brace through the whole rep, driving your hips and chest up together rather than hips-first.
- Reset the safety pins at a height just below your deepest rep so a missed lift has somewhere to land.
Spotting matters more here than with the front squat because dropping a loaded bar from behind your shoulders is awkward and risky. Use a spotter for near-max attempts, and always set rack safety pins when training alone. Common faults include knees caving inward, hips shooting up faster than the chest, and heels rising off the floor, all of which usually trace back to tight ankles or insufficient bracing.
Pro Tip: If your heels lift during the descent, work on ankle dorsiflexion before adding more load, since poor ankle range forces compensation higher up the chain.
4. Loading, relative 1RM expectations, and fatigue effects
Most lifters move less absolute weight on a front squat than a back squat, often by a meaningful margin, because the upright position limits how much the hips and hamstrings can contribute. This varies individually, so treat any ratio as a rough starting point rather than a fixed rule.
- For strength work, 3 to 5 sets of 3 to 6 reps on either squat, loaded close to your working max, builds the base most programs are built around.
- For hypertrophy, 3 to 4 sets of 8 to 12 reps with a lighter load keeps tension high without wrecking your recovery for the next session.
- Push load only after your depth, bar path, and bracing are consistent across every rep, not just your best one.
ACSM’s 2026 resistance training guidance points to roughly 80% of your one-rep max for strength-focused work and higher weekly volume for hypertrophy, with the caveat that programming should be individualized rather than following one fixed formula. That same body of research also found that ground reaction force can drop more sharply in a back squat after a fatiguing set, which is worth factoring in if you are stacking several heavy sets of back squats late in a session.
5. Mobility, equipment needs, and safety
Each squat has its own mobility bottleneck, and knowing yours ahead of time saves a lot of frustrated training sessions.
- Front squats demand wrist extension, thoracic extension, and ankle dorsiflexion; straps or the crossed-arm grip are legitimate workarounds while those ranges improve.
- Back squats demand hip and ankle mobility to hit depth without your lower back rounding, and heavy work requires rack safety pins or a spotter.
- Front squats are generally easier to bail on safely, since you can simply drop the bar forward if a rep stalls.
- Back squats need more deliberate safety setup: set your pins just below your lowest rep depth and use a spotter for anything near your max.
A short warm-up of ankle rocks, thoracic rotations, and a few empty-bar reps in your chosen rack position goes a long way before loading either lift. Lifters managing joint sensitivity or bone health concerns sometimes look into complementary approaches like osteogenic loading, which targets bone density through controlled mechanical stress rather than traditional barbell work.
Pro Tip: Spend two minutes on ankle mobility before every squat session. Tight ankles are behind more technique breakdowns than weak hips.
6. How to choose which squat to focus on
Your goal should decide your primary squat, not the other way around.
- If your priority is maximal strength or a powerlifting total, make the back squat your main lift and use front squats as a quad-focused accessory.
- If you are managing lower-back sensitivity, rehabbing a hip or spine issue, or need a more upright pattern, lead with front squats.
- If you are a beginner still learning to brace and control depth, start with front squats or goblet squats since the upright position is easier to self-correct.
- If your sport rewards an upright trunk and strong quads, such as sprinting or jumping, weight your programming toward front squats.
- If you want balanced development and have the recovery capacity, rotate both across a training block rather than picking one permanently.
- A strength-focused two-week microcycle might pair heavy back squats early in the week with lighter front squats later in the week for volume.
- A hypertrophy-focused microcycle can flip that, using front squats for higher-rep quad work and back squats for posterior-chain volume.
- Beginners benefit from spending several weeks on goblet and front-rack patterns before adding back squat depth and load.
Our guide to strength training program types walks through how to structure a block once you have picked your primary squat.
7. Level Up Gym coaching notes and sample progressions
We build every new lifter’s squat progression the same way: control the pattern before adding load. A typical front squat progression runs goblet squat, then front rack with strap support, then clean-grip front squat, then a paused front squat, and only then loaded working sets, moving to the next step once elbow position and torso angle hold steady for every rep.
- Beginners in our onramp program start with bodyweight and goblet squats before touching a barbell in either rack position.
- A sample strength-focused microcycle pairs two back squat sessions with one front squat session over two weeks, building load on the back squat while keeping the front squat as a technical quad anchor.
- A sample hypertrophy-focused microcycle leans heavier on front squat volume, using back squats once a week to keep posterior-chain strength moving.
- We coach bracing, elbow height, and depth as the three non-negotiables before chasing heavier plates on either lift.
Our functional strength training approach applies the same pattern-first philosophy across every major lift, not just the squat.
8. A coach’s take on choosing your squat
Neither squat is objectively better. The right one depends on your goal, your joints, and how consistently you can execute it under load. Chase technique before you chase numbers, because a clean 185-pound front squat will carry you further than a shaky 225-pound one. If you are unsure which pattern fits your body, get a second set of eyes on your form before adding weight.
— Malcolm
How Level Up Gym helps you learn and progress both squats
Learning either squat well is a coaching problem before it’s a loading problem, and that’s where we come in. Our 6-Week Onramp at $699 one-off is built for lifters who want a guided path into squat technique without guessing at form on their own, and our 1-on-1 Personal Training sessions, running $149.99 to $359.99 per week, are the fastest way to fix a specific fault like a collapsing front rack or rounding low back.
- Beginners learning either squat pattern fit well in our 6-Week Onramp.
- Lifters chasing a specific technical fix benefit most from 1-on-1 coaching.
- Lifters who want progressive overload with accountability can join Small Group PT (2 to 4 people), priced $74.99 to $174.99 per week per person.
- Lifters outside Stratford or Bridgeport, CT can still get coaching through our Online Training option.
Every new member starts with a free class or consult and leaves with a written, individualized plan. Book your free class and get a squat assessment built around your goals.
FAQ
Is a 225-pound front squat impressive?
A 225-pound front squat is a strong, intermediate-to-advanced benchmark for most lifters, since front squats generally load lighter than back squats for the same person. Context matters more than the number itself: bodyweight, training history, and depth all shift what counts as impressive.
Why are front squats so much harder?
Front squats feel harder mainly because the upright torso position limits hip and hamstring contribution, shifting more demand onto your quads and core to keep the bar balanced. Research comparing the two lifts found that back squats produce higher compressive forces and knee extensor moments, while front squats force a more quad-dominant, stability-heavy pattern that fatigues differently.
Can I replace a back squat with a front squat?
Yes, front squats can substitute for back squats in most programs, especially for lifters managing lower-back sensitivity or wanting a more upright pattern. The trade-off is lower absolute load capacity, so strength-focused goals built around maximal back squat numbers will need adjusted expectations.
Is a 200-pound front squat good?
A solid, intermediate front squat standard varies widely depending on bodyweight, sex, and training age, rather than being a single fixed number.
Sources
- A biomechanical comparison of back and front squats in healthy trained individuals
- Effects of anterior-posterior load placement on squat biomechanics (PMC)
- ACSM publishes updated resistance training guidelines
Authoritative studies and guidelines cited
- A biomechanical comparison of back and front squats in healthy trained individuals
- Effects of anterior-posterior load placement on squat biomechanics
- ACSM publishes updated resistance training guidelines
- Comparative EMG and GRF study detailing hamstring activation differences
- Muscle activation patterns of lower body during front squat vs back squat